You Light Up My Life: Exposure Compensation in Photography
The world of photography can seem overwhelming, especially for beginners. Various aspects need your attention, but none more crucial than mastering exposure. And a key tool for managing exposure is exposure compensation.
What is exposure compensation?
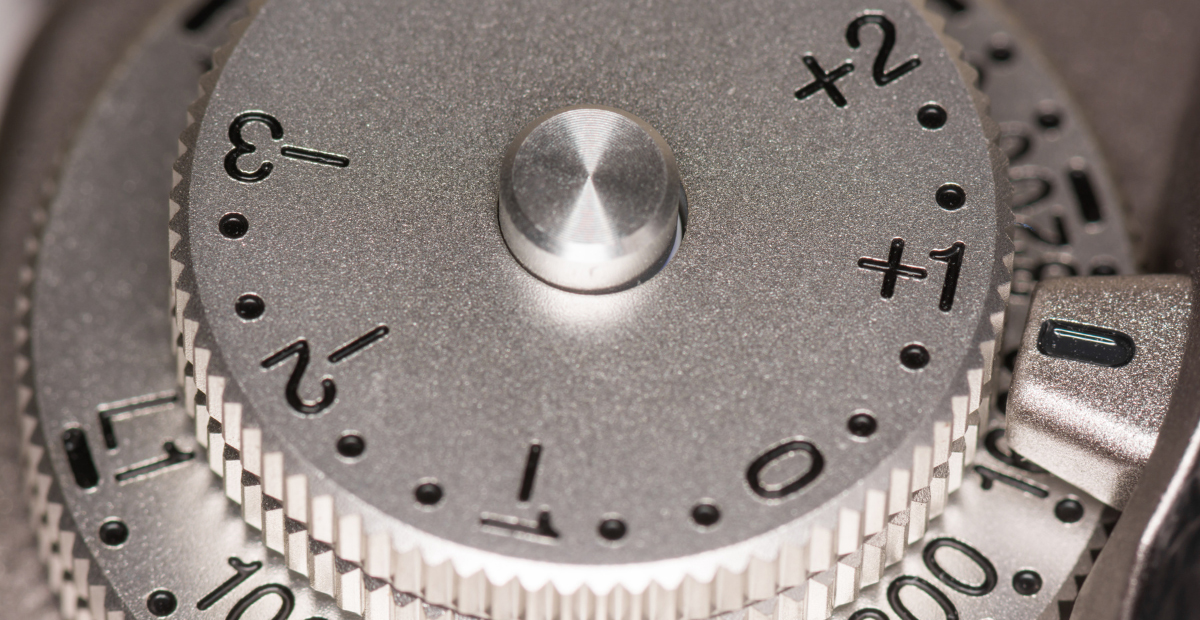
At its core, exposure compensation is a feature available on most digital cameras. It allows photographers to adjust the exposure set by the camera’s light meter to darken or lighten images before capture. This feature can be incredibly beneficial, particularly in situations where lighting conditions make it challenging to get the perfect shot.
Exposure compensation is measured in stops or EVs (Exposure Value). A change of one stop either doubles or halves the amount of light hitting the sensor. Increasing exposure by one stop (+1 EV) doubles the amount of light, brightening the image, while decreasing by one stop (-1 EV) halves the light, making the image darker.
When to use exposure compensation
Knowing when to use it is just as important as understanding how. Cameras are smart, but they’re not always perfect. They calculate exposure based on an average of the scene’s overall brightness.
This method works well for evenly lit scenes but tends to fall a little short in high-contrast situations. For example, when photographing a snowy landscape, your camera might underexpose the scene because of the bright snow. In such a case, using exposure compensation to increase exposure can correct this.
Similarly, if you’re photographing a subject against a bright background, your camera may overexpose the image. As a result, the subject, which should be the image’s focal point, becomes dark and underexposed. This is when using exposure compensation would allow for a better balance.
How do you adjust exposure compensation?
Most digital cameras have an easily accessible exposure compensation button or dial. After pressing this, use your camera’s main dial to adjust the exposure. Keep in mind that after taking the shot, it’s important to reset it back to zero to avoid unintentionally over or underexposing future images.
The best way to grasp exposure compensation is through practice. Try shooting in varying light conditions, adjust your settings, and observe the results. With time, you’ll understand how different scenes affect your camera’s metering and how to use this impressive feature to counteract this.
Ready to dive in and practice it for yourself?
Exposure compensation may be a humble feature, but it has a powerful impact on the final image quality. By giving you the ability to control light levels, it ensures that your photos are never too dark or too bright.
Remember, while it’s great to have all the latest gadgets, understanding the basics is what will set your photography apart. With patience, practice, and a keen eye for detail, you can take full advantage of this tool, helping you capture images exactly how you envision them.
For more in-depth knowledge, tips, and a plethora of handy materials, make sure to subscribe to our YouTube channel and stay updated with our blog. If you have any queries, Arwyn, the Time-Lord, is always available for guidance. Don’t hesitate to reach out for advice.